Char-Broil 463247412 User's Guide
Browse online or download User's Guide for Barbecues & grills Char-Broil 463247412. Char-Broil 463247412 Product guide [en] [es] [fr] User Manual
- Page / 28
- Table of contents
- TROUBLESHOOTING
- BOOKMARKS
- PRODUCT GUIDE 1
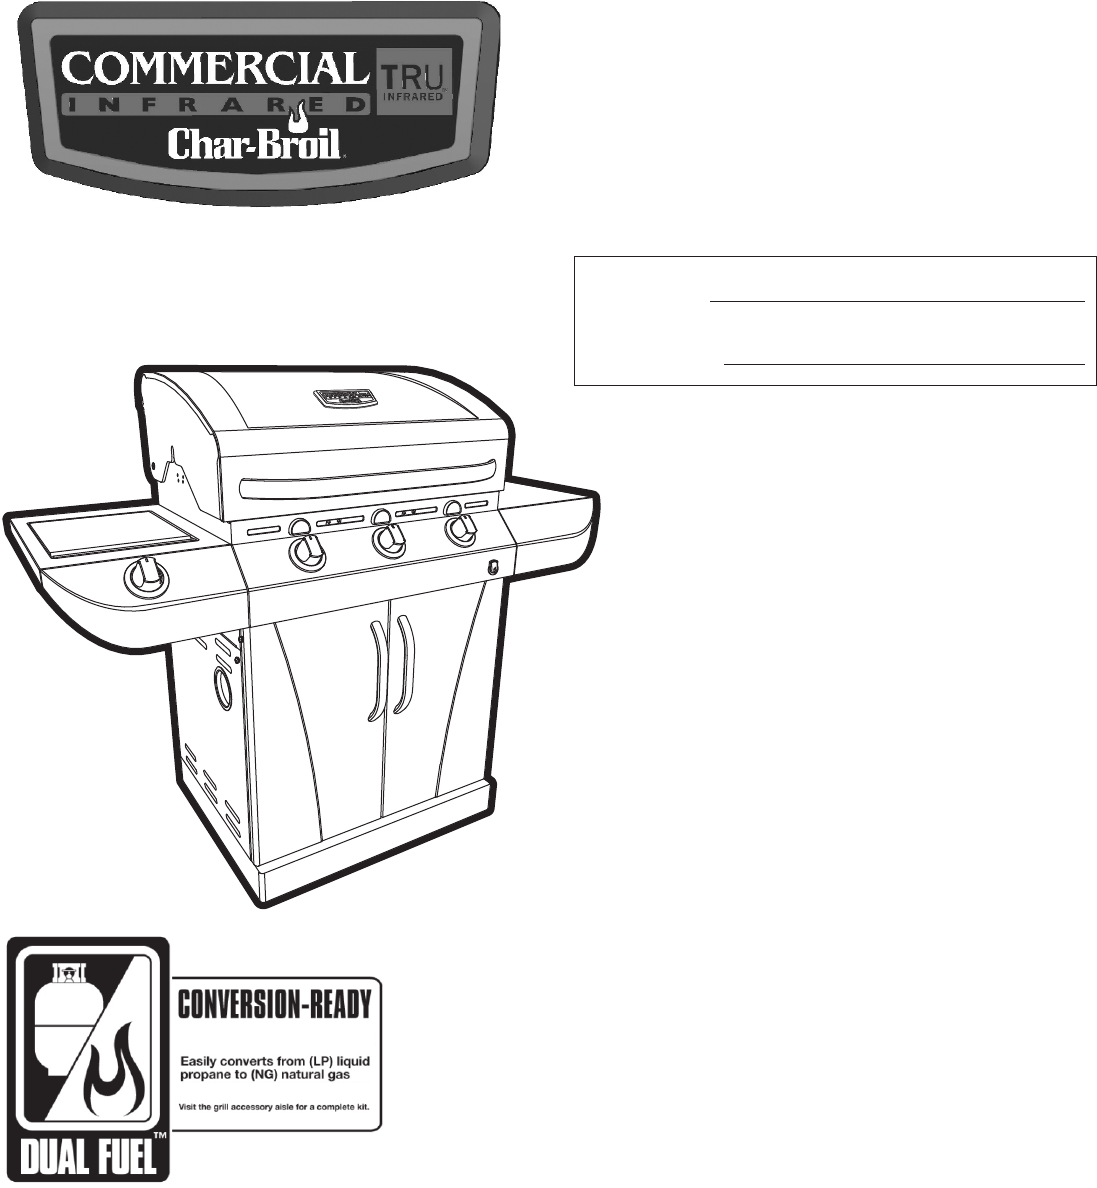
- MODEL 463247412 1
- CAUTION: 2
- INSTALLER/ASSEMBLER: 2
- CONSUMER: 2
- WARNING: 2
- OPD Hand Wheel 4
- LP Cylinder Valve 4
- Retainer Strap 4
- Straight 6
- SPIDER ALERT! 9
- LIMITED WARRANTY 10
- PARTS LIST 11
- PARTS DIAGRAM 12
- Non-lock caster 13
- ASSEMBLY 13
- Upper back panel 15
- 7mm flat 16
- 7mm lock 16
- Burner tube 17
- Front brace 18
- Electrode 18
- Sideburner grate 18
- Note: some parts omitted 19
- Note: Some parts omitted for 20
- clarity of illustration 20
- AA Battery 22
- Electronic Ignition Cap 22
- Cylinder screw 22
- Troubleshooting 23
- Troubleshooting (continued) 24
- P.O. Box 1240 27
- Columbus, GA 31902-1240 27
Summary of Contents
Char-Broil Commercial T-36DAssembly instructions © 2011 PRODUCT GUIDEMODEL 463247412 © 2011 Char-Broil, LLC Columbus, GA 31902Printed in Ch
This warranty only applies to units purchased from an authorized retailer. Manufacturer warrants to the original consumer-purchaser only that this pr
PARTS LIST NOTE: Some grill parts shown in the assembly steps may differ slightly in appearance from those on your particular grill model. However, th
PARTS DIAGRAMQQ12BBSRRSSSSTTGGDDWWEEHHIIJJOOPPFFUUVVVVXXVVUUUUOONNLLMMMMKKCCZAAYYZZXXXXYWOAAAAAAPOOQQNABCEFHVIKLMJRDDGCUYYYTZZ
21/4-20x1/2” screw1Attach side panels to bottom shelf using three 1/4-20x1/2” screws, 7mm lock washers, and 7mm flat washers per panel.IMPORTANT: Pa
34This step requires two people to lift and position grill head onto cart. Carefully lower the grill head onto the cart, aligning slots at bottom of g
On back of grill, place upper back panel between side panels and above lower back panel. Secure upper back panel, in lower holes, using one 1/4-20x1½”
761 Now you may fully tighten lower screws on upper back panel.1/4-20x3/4”screwBack of main control panelControl panelFascia, left sideburner shel
9Insert sideburner burner into left shelf.shelf, shown A.The stud on bottom of burner fits into rear small hole in sideburner drip pan onSecure burner
11Insert front brace under control panel and between cart side panels. Make sure door hinge pins are on the top side and facing the front. Secure usin
13 19*This side UPTank heat shield12Inside of cart, insert rear shield tab into left slot on upper of lower back panel. Attach front shield tabs under
1. Do not store or use gasoline or other flammable liquids or vapors in the vicinity of this or any other appliance.2. An LP cylinder not connected fo
1520Install flame tamers by sliding one end of each flame tamer into slots at front of firebox and resting opposite end on pins in back of firebox.Bac
On back of grill, slide grease tray into opening in upper back panel.CAUTIONFailure to install grease tray will cause hot grease to drip from bottom o
Unscrew on cart right side panel. Insert AA battery into ignitor, negative (—) end first.Replace the cap. electronic ignition cap –1822AA BatteryElect
DANGER: If a gas leak cannot be stopped, or a fire occurs due to gas leakage, call the fire department.EmergenciesProblemGas leaking from cracked/cut/
Troubleshooting (continued)ProblemBurner(s) will not light using ignitor.(See Electronic Ignition Troubleshooting also)Burner(s) will notmatch light.
Troubleshooting - Electronic IgnitionProblem (Ignition)SECTION INo sparks appear at any electrodes when Electronic Ignition Buttonis pressed; no noise
Warranty Registration DepartmentP.O. Box 1240Columbus, GA 31902-124027
WARNINGCALIFORNIA PROPOSITION 651. Combustion by-products produced when using this product contain chemicals known to the State of California to cause
• NEVER store a spare LP cylinder under or near the appliance or in an enclosed area. • Never fill a cylinder beyond 80% full.• An over filled or impr
WARNINGIf “growing” bubbles appear do not use or move the LP cylinder. Contact an LP gas supplier or your fire department!Connecting Regulator to the
6.Turn the coupling nut clockwise and tighten to a full stop. The regulator will seal on the back-check feature in the LP cylinder valve, resulting in
Safety TipssBefore opening LP cylinder valve, check the coupling nut for tightness.sWhen grill is not in use, turn off all control knobs and LP cylind
Burner Flame Check• Remove cooking grates and flame tamers. Light burners, rotate knobs from HI to LOW. You should see a smaller flame in LOW position
Cleaning the Burner AssemblyFollow these instructions to clean and/or replace parts of burnerassembly or if you have trouble igniting grill.1. Turn g
More documents for Barbecues & grills Char-Broil 463247412

Related products and manuals for Barbecues & grills Char-Broil 463247412
 (28 pages)
 (36 pages)
 (32 pages)
© 2020, manymanuals.com. All rights reserved. | 0.473 s |
 Manymanuals.com
 Manymanuals.de
 Manymanuals.fr
 Manymanuals.it
 Manymanuals.pl
 Manymanuals.cz
 Manymanuals.es
 Manymanuals-pt.com
Comments to this Manuals